
This tutorial explains the technique I used to paint portraits of 2 characters from the Lord Of The Rings movie using Corel Painter. The tutorial highlight: settings for the painbrush tool as used in this image shows you how to obtain a painterly style in your digital paintings using Corel Painter.
Step 1
This is a quick painting execise. I picked these characters because I am a big fan of the movie and book. As a reference, I used a frame of the movie’s DVD put on pause.
Anyway, this tutorial text is almost exactly the same as the one in my digital painting tutorial, since the technique is the same.
Here it goes:
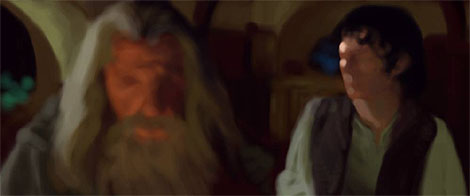
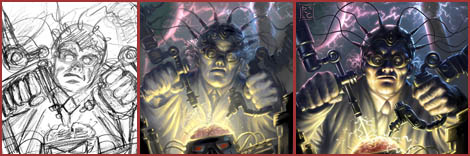
I lookd at the subjects for a minute or two, trying to absorb it’s shapes, volume, colors and mood. After this brief time, I started loosely sketching the main shapes with a large brush with a 60% opacity.
I used a limited amount of colors, mostly the predominant colors in the subject. Very important at this stage, is to get all the shapes and volume right (or almost) before moving to any detail work.
| Tool settings: |  |
Step 2
Light and dark: With a smaller brush, and a very low opacity setting, I concentrate on capturing the subject’s lighter areas. After the larger lighter areas are set in place, I might switch to an even lighter color and use it to sketch some of the brigthest highlights. Then, I move to the darkest areas.
Blending: Now, I switch to the brushes tool. This tool enables me to obtain a very realistic blending of the strokes. Also, I like its feel and its dynamics. It takes time to blend colors with the brushes tool, but I make sure each stroke is well placed. Concentration and proper control of the stylus pressure are the key.
| Tool settings for light and dark areas: |  |
| Tool settings for blending: |  |
Step 3 (Final)
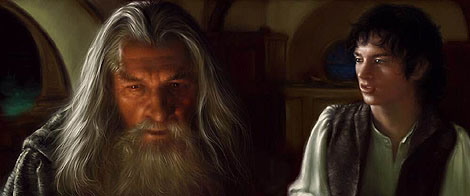
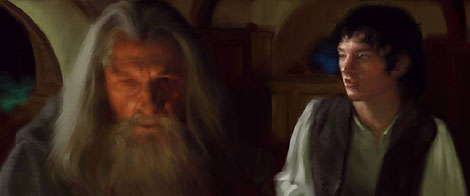
Final details and highlights. Anyway, using a smaller brush, I refined all the areas that needed more detail, especially the main features, such as the characters heads and clothes. At this final stage, I added highlights, especially in the eye and lips areas.
If you liked this tutorial, you might enjoy this link: Lord Of The Rings Stuff


“THIS IS COOL!” =D
Wow, I’m amazed at what you can do – I’ve worked a little with photoshop and Corel but its not easy to master.
Bravo to you!
Antonio: Thanks for stopping by my friend!
Violette: Thank you for the compliment. It took me about 11 years to get to this level with Photoshop. I started using in 1995 (if I remember well). And before that, I had been using Deluxe Paint on the old Amiga Computer since 1988… I go back all the way 🙂
Truly amazing work, like everything else you do. Thank you for the step-by-step, and a huge thank you for displaying your brush settings. I just started using both photoshop and painter a few months ago, and I am completely paralyzed by the sheer volume of tools in the programs. I am decent at sketching, but I’ve been unable to find any good methods to learn to do stuff like you’re doing. Could you possibly point me to some good learning tools/resources? I would be forever grateful!
But more importantly, please keep up the fantastic work! And keep sharing with us hopefuls how you do it! 🙂
Best,
Avi
You have a wonderful site. I love your art.
Wow, I yould never do it this way around. I’m always drawing flats, then shadings with different strenghts and finally highlights. And I would surely need a sketch at first 😀
Bravo!
Well done Roberto. This definitely gives me something to shoot for…the term “wow” is an understatement! I appreciate how much time you put into this. Do you have any tips on using the stylus?
esta super genial Roberto.
Wow, this is pretty much the kind of stuff I want to do! Would you suggest a class, or just mess around with it until I get this epic in my chosen style?
Wow, impressive results.
Photoshop is a modern marvel. The detail and crispness on the final image is breathtaking.
Its kinda weird nowadays that you just can’t tell what is real and what is not! Back in the days before photoshop at least you could believe what you were seeing with your own eyes.